onesevenfour/aeighttech – EWRS910 di2 junction upgrade
- Mar 28, 2017
- 4 min read
One thing that’s always bugged me is the ugly way of attaching the junction box to the stem when fitting a Shimano Di2 groupset. I’ve tried a few solutions to this including hiding the junction behind the saddle, under the BB or within the frame but now Shimano have brought out an official solution to the problem…
The existing 3 and 5 port junction boxes are attached to the stem via a rubber strip that Shimano provide. It works well but is really ugly – I guess its function over form. A few companies make a spoon shaped attachment that sits under the stem but that only tidies things up so much. A better solution I’ve found has been to hide the junction under the saddle and this is still my preferred set-up for cross bikes as the saddle protects the junction from any damage, but this month Shimano has launched a new junction box which sits in the end of the handlebar, dramatically tidying everything up.
The best news is that if you’re thinking about upgrading your existing Di2 set-up all you need is the box itself, one extra SD-50 wire and either a lot of time or a friendly local mechanic[1]– we offer the whole upgrade including labour for £199.99 at The Velo House. I start by removing the BB to get to the lower junction (usually a JC41) and unclipping the main frame/downtube SD50 wire (usually approx 1000mm or 1200mm long). I then attach a longer 1600mm SD50 wire to the BB end of the old wire with tape and pull the new wire into place, adding zipties to the new wire to stop it rattling in the downtube[2]. Clip the BB end into the junction but leave the BB open for the time being to check later. #gallery-2247-19 { margin: auto; } #gallery-2247-19 .gallery-item { float: left; margin-top: 10px; text-align: center; width: 33%; } #gallery-2247-19 img { border: 2px solid #cfcfcf; } #gallery-2247-19 .gallery-caption { margin-left: 0; } /* see gallery_shortcode() in wp-includes/media.php */


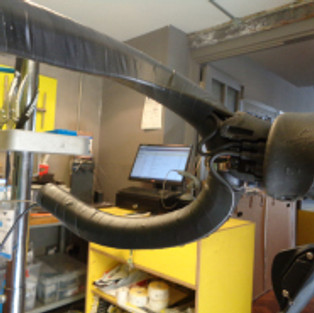
Now un-wrap and un-tape the bars to reveal all the existing wires and hoses/cables. Most handlebars will need to be drilled to make this modification (there are a few versions pre-drilled out there) and I would only suggest doing this if you’re 100% sure about what you’re doing – if in doubt don’t just start drilling stuff…it’s not the 80’s! Turn the bike upside down[3] carefully and rest on a piece of carpet. Measure back 20mm from the end of the bar and drill a pilot directly through the underside of the bar. Increase the size of the hole with a 5.5mm drill and clean up the edges before repeating on the other side of the bar.


Run the new frame/downtube SD50 wire along the same route as the rear brake cable to the shifter. Remove the existing SD50 wire (approx 350mm) from the rear brake lever/shifter and connect the new cable to the top e-tube connection. Now run a mechanical gear cable through the centre or the bar and then attach the old frame/downtube SD50 wire (which becomes the “handlebar wire”) to this with tape before pulling the SD50 wire through the bar. Connect zipties to this as per the other wires to stop rattle. Poke the handlebar wire through the hole that you drilled and run the wire up to the middle e-tube connection on the rear brake lever/shifter. Now tape up this side of the bar with electrical tape leaving a small kink near the connectors to allow for lever/shifter movement – this helps when making adjustments or troubleshooting the Di2 later on.


Run the existing SD50 wire (approx 350mm) from the front brake lever/shifter down the underneath of the bar and through the hole you drilled. The RS910 junction can now be plugged in (don’t forget the rubber grommet over the SD50 wires) and the lights should illuminate to show battery health and shifter function. Re-tape the front brake and the wire before fitting the junction into the bar with the supplied plastic cover/surround. The plastic cover locks the junction in place and sits on the outside of the bar allowing it to be taped into place. The bars can then be re-wrapped with new tape, paying attention to neatness around the junction area.


Now that the junction is secure and everything is in place I plug the charger/diagnostics tool into the junction to update the firmware. As the RS910 is a new unit I also needed to update my version of the e-tube project, before updating the whole system to the latest firmware. This allows everything to talk to one another and ensures long battery life. Most battery problems are caused by incompatible firmware issues or by removing the charger/diagnostics tool before its finished working.


Now the JC41 can be refitted into the downtube or seattube before refitting the BB with a generous amount of thick Park grease. Clean and re-fit the crank and then run through any gear adjustments as required before a quick bolt check, clean and sign-off.


Photos by Glen Whittington.
Glen rides for the Southborough & District Wheelers. He races mountain bikes, road bikes, TT and ‘cross at local and national level. He receives personal support from Helly Hansen, Scott Sports, The Velo House, and the.æight.bicycle.cømpany. Glen runs The Velo House with Olly, a coffee shop, workshop and bike shop welcoming all cyclists and non-cyclists, based at 5 St.Johns Road, Tunbridge Wells, TN4 9TN – 01892 554 505 – glen@thevelohouse.com. He also contributes to Simpson Mag @eightbikeco #aeightracer
[1] Un-friendly local mechanics are fine too.
[2] Whilst the BB is open I add zipties to the other cables too to stop them rattling.
[3] See The Rules regarding turning your bike upside down and say 3 Hail Merckx’s.


Comments